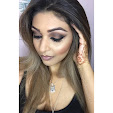
Hello Lovelies!
I'm realllyyyy excited today to tell you about a new stretch mark routine I'm trying out. Warning, it's messy and quite annoying but I really think it works!! Now remember, stretch marks can't really be permanently removed, but they can be lightened and made smoother. So here we go!
You will need:
Bio Oil
Vitamin E gel-caps
Plastic shot glasses
1. Cut open or poke holes in vitamin e capsules
2. Put the goo/gel in the shot glass
^ do this as many times as you have to to get enough to cover the areas you need to cover (I need about 10-15 capsules to cover my hips, lower back, biceps, and random other parts of my body if that helps)
3. Smooth the gel over the parts of your body that have stretch marks, or even scars.
4. Smooth a small amount of bio oil over the vitamin e gel
This will leave you very greasy, so I suggest doing this after your shower at night, or if your not going to wear anything you care about. Also the Vitamin E can possibly smell gross, but applying the bio oil on top helps that.
I started taking 1 vitamin E capsule with the rest of my daily vitamins as well just for an extra boost. You can also use bio oil in the morning and the Vitamin E & Bio Oil at night.
I started noticing a difference instantly, but I'm going to keep doing this for a while to see, I'll take after pics soon and post them!
Try this and see how it works for you and let me know how it goes!
Sunday, October 31, 2010

Sunday, October 24, 2010
Lavendar & Purple Fall Look
Hiiee Ladies!
Hope you enjoyed this look, it's definately my favorite this season!
I used:
MAC e/s in Crystal
MAC e/s in Shroom
MAC e/s in Nocturnelle
Revlon Colorstay Liquid Eyeliner in Black
Dior Diorshow Mascara in Black 090
Sephora Medium Shader and Crease Brushes
Hope you liked this! Stay tuned for more! (Subscribe to the channel and blog pleeeasseee!)
Tips & Tricks: Liquid Foundation
Hello Ladies!
Here is my second Tips & Tricks video on liquid foundation application!
I used:
Nurturing Force Blot Out Offensive Primer
Smashbox Healthy FX Foundation in M2 or Medium 2
Smashbox Concealor in Medium
Make Up Forever HD Microfinishing Powder
MAC Pet Me Blush
Sephora Powder Brush
Sephora Concealor Brush
Sephora Mini/Travel Sized Retractable Powder/Blush Brush
EnKore Makeup Stipple and Swirl Brush
Hope this helps! For more tips & tricks stay tuned and request!
Monday, October 11, 2010
Gold & Black Smokey Eye
Hey guys I'm backk!
Here is my gold and black smokey eye tutorial. I ran out of time because I tried filming both eyes which is just a bad idea.. BUT have no fear I have a tutorial for my eyeliner up so if you need tips on that definitely refer back to that!
I used:
Urban Decay Deluxe e/s in Honey
Urban Decay e/s in Oil Slick
MAC e/s in Shroom
Enjoy!! And comment this or the video with any questions, requests or suggestions & FOLLOW AND SUBSCRIBE to me pleeeasseee
Thursday, September 16, 2010
Fall Nails
This fall it's all about purple and grey for me.. not just with nails but clothes too. This was my way of combining those 2 colors for my nails. Fall generally calls for deeper colored nails than in the summer which is all about bright colors. I'm still tan from the summer so the deep colors work for me until it fades.
As a side note, I do my finger nails once a week, although I use Seche Vite Dry Fast Top Coat my nail polish still seems to chip.. it may be the base I'm using so I'll give my fast drying top coat the benefit of the doubt. However I think that the fast drying agents make the nail polish more susceptible to chipping.. just my observation.. I'm not so sure if that's scientifically proven or not!!

I used O-P-I's Funkey Dunkey and China Glaze's Recycle


Have fun with your nails and NEVER be afraid to try out different fun colors, I never strayed from the reds, and deep pinks and burgundy's but once I did I fell in love with doing my nails and wearing all the pretty colors and experimenting with different designs!! PS it is also really important to me to keep my nails in shape now that I do makeup at Macy's I find that I big part of my clientelling is looking nice, including my nails.
Tuesday, September 14, 2010
All About Foundation & Application- Sponge vs Brush
I noticed that many girls don't quite know how to apply their foundation, whether its liquid, cream, stick, or powder so I'm here to help!
Primer- I think using primer is very effective but only after you moisturize your skin. So you'd wash and moisturize your face let it dry and then apply your primer and let that dry before you apply your foundation no matter what kind it is.
I use Laura Mercier's Oil Free Primer and I like it it's not bad.. I may experiment with Shiseido's new primer though. If I do I'll do a comparison review.
Setting Powder- very important for liquid and some cream foundations, if not you end up with a greasey, runny look and the makeup can run and get on clothes.
I use Make Up Forever's HD Setting Powder.. it's amazing you may get a little white cast if you don't blend it out well with a brush!
Concealer- use on dark circles around eyes, and scarring, hyper pigmentation, rosacea, etc. Apply after liquid, or cream foundations so that you use less.. if you want you can use it before it's up to you. Using a concealor brush works best, and they smooth it out with your fingers if you need to.
I use Smashbox Healthy FX(i think) concealer
Types of Foundations-
Airbrush- More rare special occasion use, pricey and full buildable coverage, no setting required
Liquid- Special occasion to everyday use, moderately pricey, medium to full coverage, need to set
Cream/Stick- Moderately everyday use, not too pricey, medium to full coverage, should set
Powder- Everyday use, relatively inexpensive, sheer coverage not too buildable, no setting required
I use Smashbox Healthy FX Liquid and Sephora Brand Mattifying Powder Foundations.
Okay now for application. Working in cosmetics and helping women choose what foundations are best for them and teaching them how to apply it I found out that many women aren't applying their foundation right. For a natural, polished look applying your foundation correctly is KEY.
Airbrush makeup if you have the compressor and airbrush you don't need anything else. However, you can use airbrush makeup with out all of the fancy equipment. Simply use a few drops on your hands and rub it into your skin quickly because it sets fast. You may not need to prime your skin when you do this, and definitely no setting powder.
Liquid Foundation-
Sponge
Primer- I think using primer is very effective but only after you moisturize your skin. So you'd wash and moisturize your face let it dry and then apply your primer and let that dry before you apply your foundation no matter what kind it is.
I use Laura Mercier's Oil Free Primer and I like it it's not bad.. I may experiment with Shiseido's new primer though. If I do I'll do a comparison review.
Setting Powder- very important for liquid and some cream foundations, if not you end up with a greasey, runny look and the makeup can run and get on clothes.
I use Make Up Forever's HD Setting Powder.. it's amazing you may get a little white cast if you don't blend it out well with a brush!
Concealer- use on dark circles around eyes, and scarring, hyper pigmentation, rosacea, etc. Apply after liquid, or cream foundations so that you use less.. if you want you can use it before it's up to you. Using a concealor brush works best, and they smooth it out with your fingers if you need to.
I use Smashbox Healthy FX(i think) concealer
Types of Foundations-
Airbrush- More rare special occasion use, pricey and full buildable coverage, no setting required
Liquid- Special occasion to everyday use, moderately pricey, medium to full coverage, need to set
Cream/Stick- Moderately everyday use, not too pricey, medium to full coverage, should set
Powder- Everyday use, relatively inexpensive, sheer coverage not too buildable, no setting required
I use Smashbox Healthy FX Liquid and Sephora Brand Mattifying Powder Foundations.
Okay now for application. Working in cosmetics and helping women choose what foundations are best for them and teaching them how to apply it I found out that many women aren't applying their foundation right. For a natural, polished look applying your foundation correctly is KEY.
Airbrush makeup if you have the compressor and airbrush you don't need anything else. However, you can use airbrush makeup with out all of the fancy equipment. Simply use a few drops on your hands and rub it into your skin quickly because it sets fast. You may not need to prime your skin when you do this, and definitely no setting powder.
Liquid Foundation-
Sponge
- Pros
- Full coverage
- Don't need as much as if you were using a brush
- Blocks out glands in your face
- Cons
- Looks unnatural
- Messy
- May not get into creases in the face
- Doesn't blend well
Brush
- Pros
- Blends well
- Full/Medium coverage you can determine that
- Buildable
- Get all your creases
- Looks natural
- Cons
- Use more foundation
- If your brush isn't clean it can look streaky
With liquid foundation using a brush to apply is a must. For those of you who want the extra coverage then a sponge may work better but you can distribute the coverage better with a brush.
Cream & Stick Foundation
Most cream foundations come with sponges, if it's a cream to powder finish a sponge is ok for application, other wise a brush is always better in terms of coverage and to get a nice finish. If it's a stick then you can use a brush to blend out the rough spots.
Powder Foundation
For totally sheer coverage a brush, for medium coverage a sponge. Most come with sponges.
All of the products I use can be found at a Sephora or Ulta :) if you have any further questions comment!!
Cream & Stick Foundation
Most cream foundations come with sponges, if it's a cream to powder finish a sponge is ok for application, other wise a brush is always better in terms of coverage and to get a nice finish. If it's a stick then you can use a brush to blend out the rough spots.
Powder Foundation
For totally sheer coverage a brush, for medium coverage a sponge. Most come with sponges.
All of the products I use can be found at a Sephora or Ulta :) if you have any further questions comment!!
Monday, September 6, 2010
Should I offer makeup services?
I made a poll above and here is what I am considering.
I was thinking about offering make up services for all occasions.. weddings, proms, homecoming, formals, fashion shows, dance troupes, parties etc for fun.
My rates would be :
$15 for eyes with or without falsies
$20 for full face (using your own foundation)
$25-30 for full face (using my products depending on the occasion)
For a group the rates will be lower*($10-15 per girl full face etc depending on how many girls)
I want your thoughts on if I should pursue this on a larger scale or not.. I always do friends/family members make up but I'm thinking about advertising myself on craigslist and facebook but I won't if no one's interested you know?
So comment below or vote on my poll with your thoughts on pricing etc.. if the poll disappears and I can't repost it PLEASEEE comment and let me know what you think!
I was thinking about offering make up services for all occasions.. weddings, proms, homecoming, formals, fashion shows, dance troupes, parties etc for fun.
My rates would be :
$15 for eyes with or without falsies
$20 for full face (using your own foundation)
$25-30 for full face (using my products depending on the occasion)
For a group the rates will be lower*($10-15 per girl full face etc depending on how many girls)
I want your thoughts on if I should pursue this on a larger scale or not.. I always do friends/family members make up but I'm thinking about advertising myself on craigslist and facebook but I won't if no one's interested you know?
So comment below or vote on my poll with your thoughts on pricing etc.. if the poll disappears and I can't repost it PLEASEEE comment and let me know what you think!
Subscribe to:
Posts (Atom)